Howdy, some quick context up top: this is a setup guide for the Elgato Wave Link software. Unfortunately, right now Elgato is missing a lot of Mac-specific documentation and it’s caused some frustration for me so I wrote this up based on their existing Windows articles. I hope it helps other Mac users using Elgato’s Wave mics or interface.
Note, while I’m using a Wave XLR interface and you’ll see that reflected in the screenshots, this guide should still apply to folks using one of their Wave mics as well.
Installing Wave Link on macOS
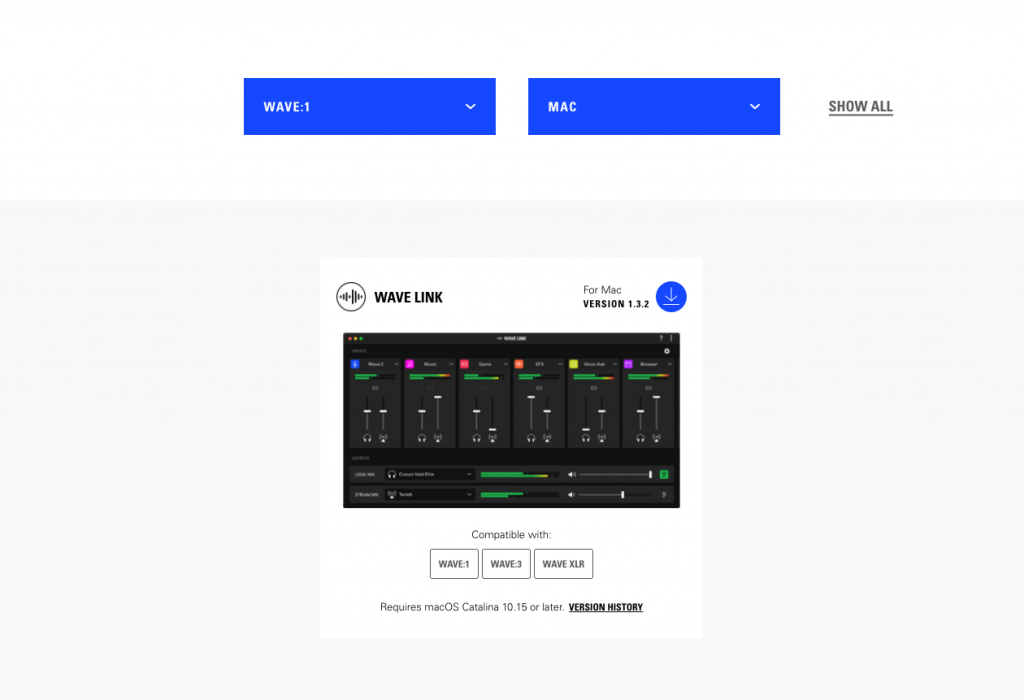
Download the Wave Link software from the downloads page on the Elgato website.

Disconnect the Wave:1, Wave:3, or Wave XLR interface if they are currently connected.
Once the download is finished, click on the .pkg file to start the installer. Follow the prompts in the installer to install Wave Link onto the Mac.
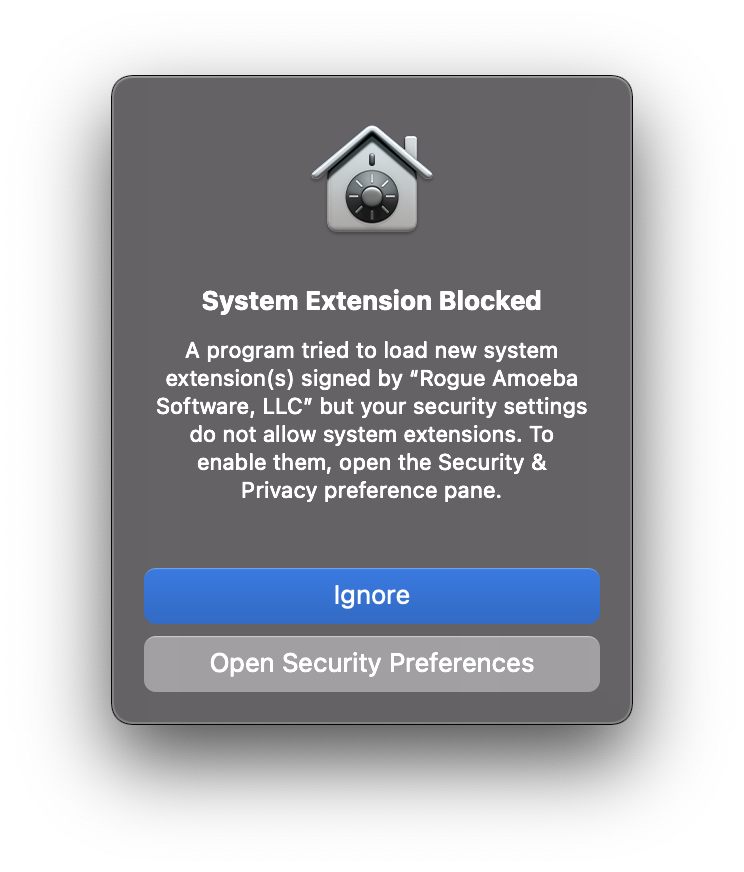
Once the installer is finished, if you are using an Apple Silicon mac (M1, M1 Pro, M1 Max CPU), you’ll see a warning pop up about a blocked system extension.

Follow the guide here to enable the system extension. This extension is required for Wave Link to capture application audio.
If you have previously installed Wave Link on this computer, you may not see this message as a typical uninstallation does not remove the extension.
Configuring Wave Link on macOS
When you open Wave Link for the first time, the first time setup wizard will walk you through the initial configuration step by step.

Start by selecting your Monitor Output. This will usually be the headphone output of your Wave device, but it can be any audio output connected to your Mac.
Next, you can start adding your channels.
Your Wave hardware device (Wave:1 or Wave:3 microphone or Wave XLR interface) will automatically be added as the first input in Wave Link. A Wave device must be connected for the Wave Link software to work.

You can add up to 8 additional inputs for a total of 9. On macOS, an input can either be an application or hardware input device connected to your system.
To set up an application audio channel, as long as you have the application open, it will show up as an option in the Add Audio Input dialog box. Once added, even if you quit the application, the channel configuration will be maintained in Wave Link.

Note: As far as I can tell based on my personal experience and the few pieces of macOS-specific articles/videos I could find, Wave Link on macOS does not currently support Virtual Inputs like on Windows 10/11 and you will not see System, Browser, Voice Chat, SFX, Game, Aux 1, or Aux 2 inputs as an available audio input. I am working with the Elgato support team to confirm this.
To learn more about Virtual Inputs on Windows, read this article.
To adjust the settings of your microphone or interface, click on the area where the icon and name are displayed on the top of the channel strip.
You can learn more about configuring the Wave XLR settings in this article.
Add the Wave Link Stream Mix to OBS Studio on macOS
Once your hardware and Wave Link software are configured and you’ve set your levels, it’s time to connect your Stream Mix to OBS.
While these instructions are specific to OBS Studio on macOS, any streaming app will work similarly and any app on macOS that has a configurable input (video chat apps, audio production tools, etc) will be able to see the Stream Mix as a discrete audio source.

Start by opening OBS Studio. Ensure the profile you want to use for streaming is active.
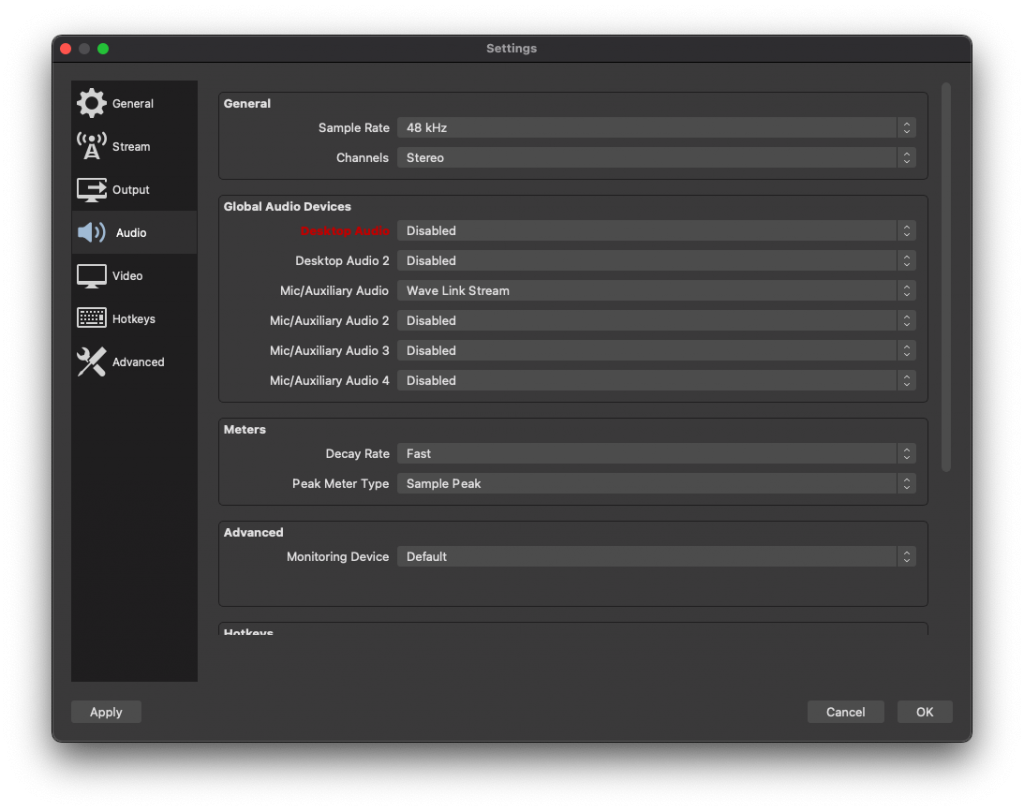
In the Controls panel, click on Settings. In the window that pops up, click Audio on the left sidebar.

Under General, set the Sample Rate to 48 kHz. Under Devices, open the Mic/Auxiliary Audio drop down menu, select the Wave Link Stream source.
Click on Apply and OK.
You now have your Wave Link Stream source configured in OBS on macOS. As a best practice, you should adjust levels for each channel within Wave Link and keep the OBS audio source level set to 0.0dB.
Note that any filters that are added to the Wave Link Stream source in OBS affect all sounds, including the game, music, voice chat and any other inputs you’ve set up in Wave Link. Thus it is recommended to not use any filters on the Wave Link Stream input.
I hope this was useful! I’m a big fan of compact interfaces like the Wave XLR and the goXLR mini. Before these types of devices existed, I resorted to some pretty extreme measures to mix audio for game streaming.

